


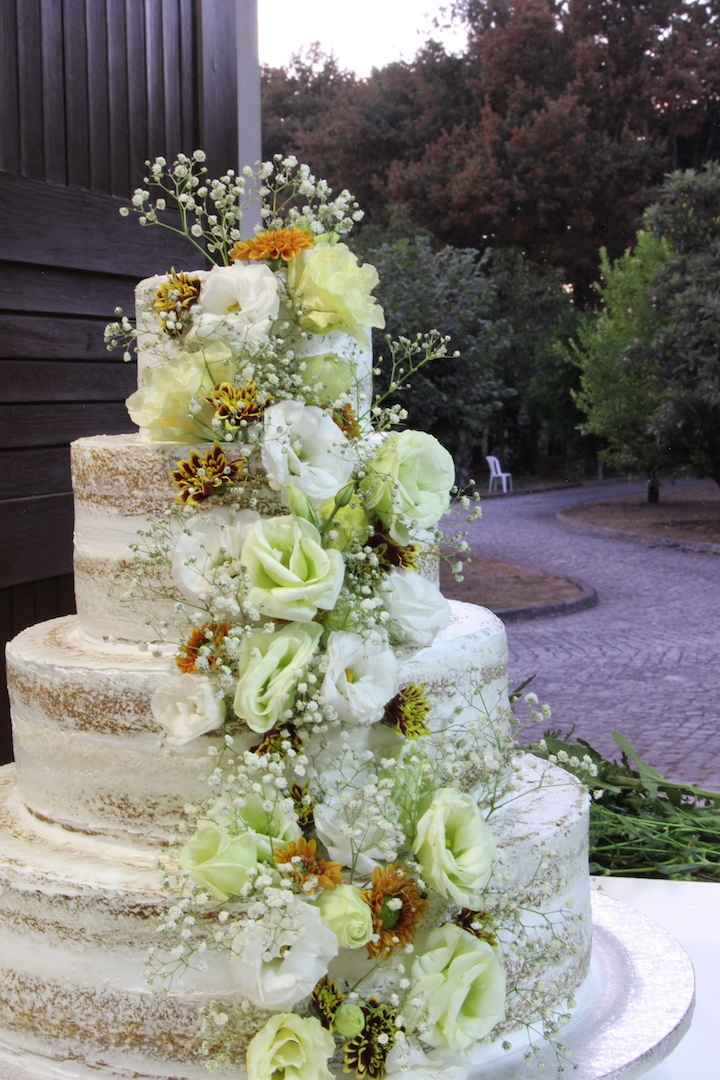


This is an impressive vegan wedding cake specially made to order. A challenge worthy of a great chef to create an elegant cake.
Making a four-tier wedding cake requires skill and finesse. Here is everything it takes to craft a beautiful, four-stack high wedding cake. Gather the ingredients, have fun, and go for it.
One of our chefs crafted this cake at a mutual friend’s wedding where the entire menu was traditional and vegetarianiced. Upon the bridegroom’s request, we also prepared a vegan version. The elaborate event had over 250-300 guests and took place in a sprawling garden. Just like the vegan cake, all the food was traditional, local, and made vegetarianiced. The bridegroom loved the cake just as much as the other guests.
This guide is your ultimate tutorial for baking and decorating a vegan wedding cake at home. For any home baker, this DIY wedding cake recipe is a step-by-step tutorial on how to bake, assemble, and decorate a four-tier cake!
This homemade vegan wedding cake promises to wow any crowd with its super tender and moist layers smothered in a decadent, rich vegan buttercream frosting and finished with elegant, plant-based floral decorations.
The cake, in my opinion, speaks volumes about the couple and the wedding theme. It truly is the focal point of the post-nuptial bash!

Vegan Wedding Cake
Who doesn't want a perfect vegan wedding cake on their big day? Here is the ultimate recipe to make your day special.
Ingredients
- 3 kg of white wheat flour (without yeast)
- 24 tablespoons of cake yeast
- 1200 milliliters sunflower oil
- 3 liters / 3 quarts of orange juice (skin can be used too)
- 2.1 kg brown sugar or coconut sugar (syrups are not advised here)
- Types of equipment:
- Baker plastic bag for the filling
- 2 large containers for mixing the cake
- One electric blender
- 4 different diameter round molds
- 1 small round rotating table
- 1 hard cardboard beautiful decoration base of your choice (I have used a silver one)
- 3 cake paper dishes cut to the same diameter as each cake.
- 2 pieces 30 cm/12 inches plastic round tubes for holding stacked layers
- Spatula for whipping
Instructions
Filling
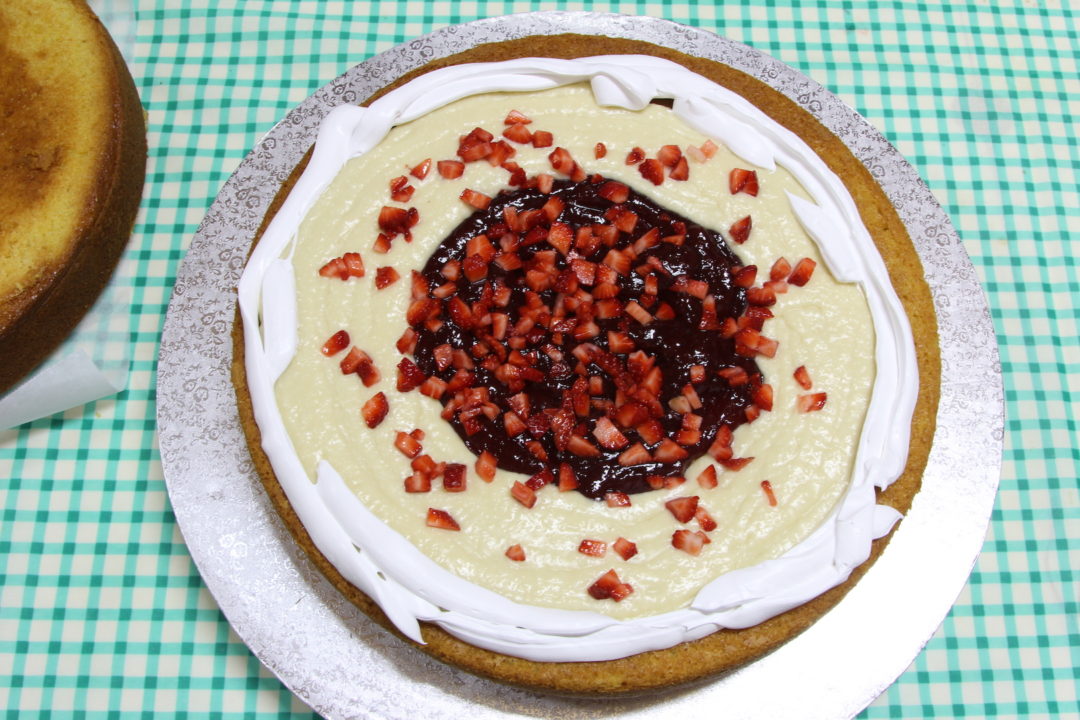
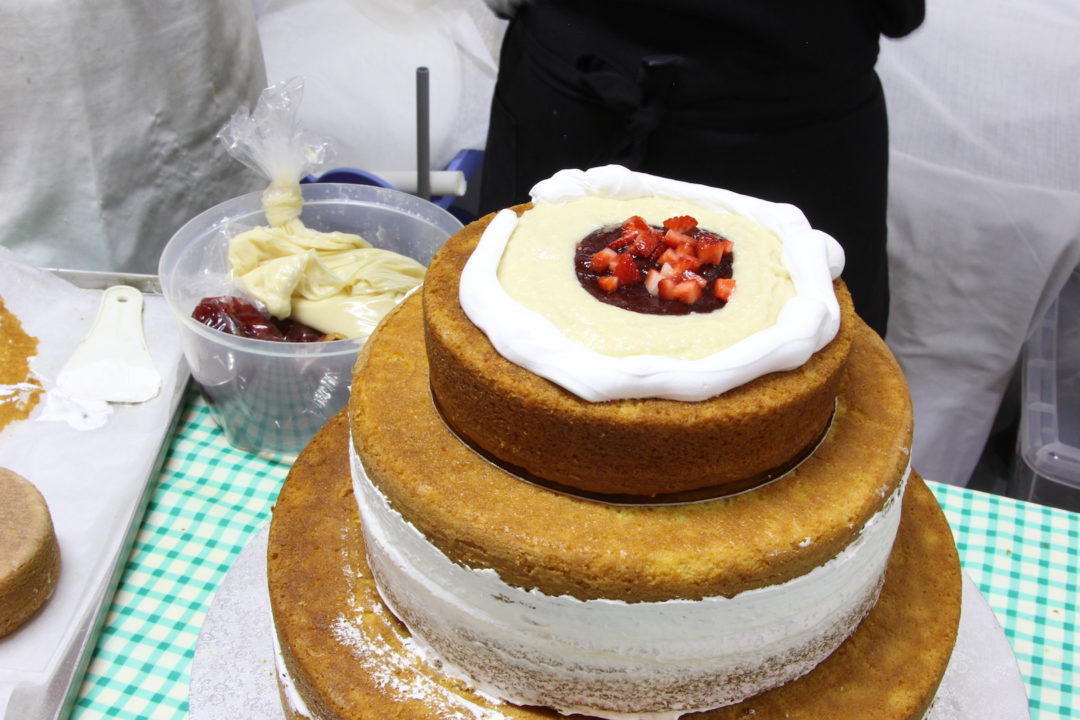
Coconut Cream: Blend coconut milk with shredded coconut and transfer it to a piping bag. Refrigerate for at least 2 hours until firm.
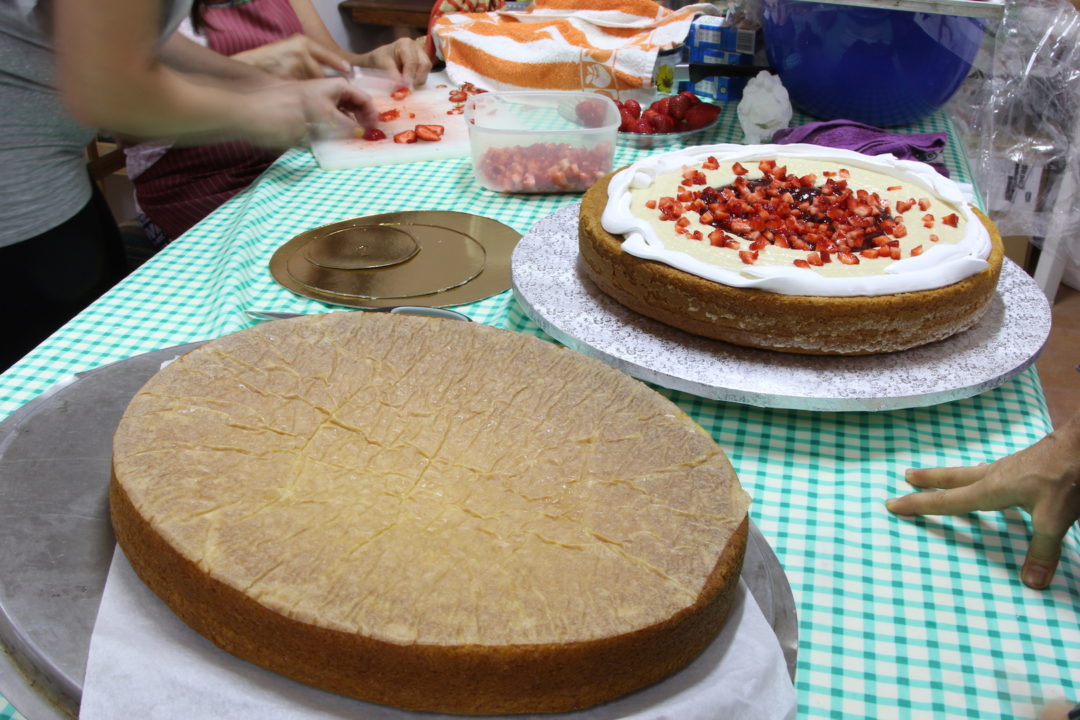
Strawberry Filling: Mix three jars of strawberry jam with 20 finely chopped fresh strawberries and place in a piping bag.
Vegan Whipping Cream (1L/33 oz.): Used for sealing and achieving the semi-naked finish. Keep refrigerated for a few hours before use to ensure firmness.
Preparation
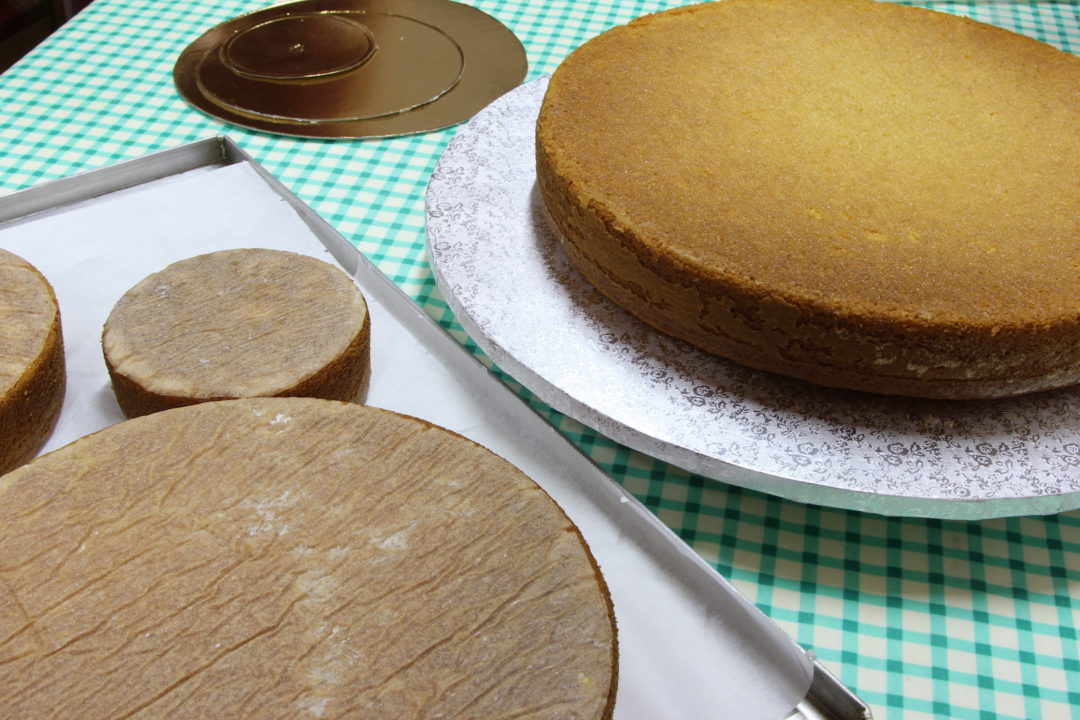
This cake requires 6 kg of flour, divided into two batches to create four layers.
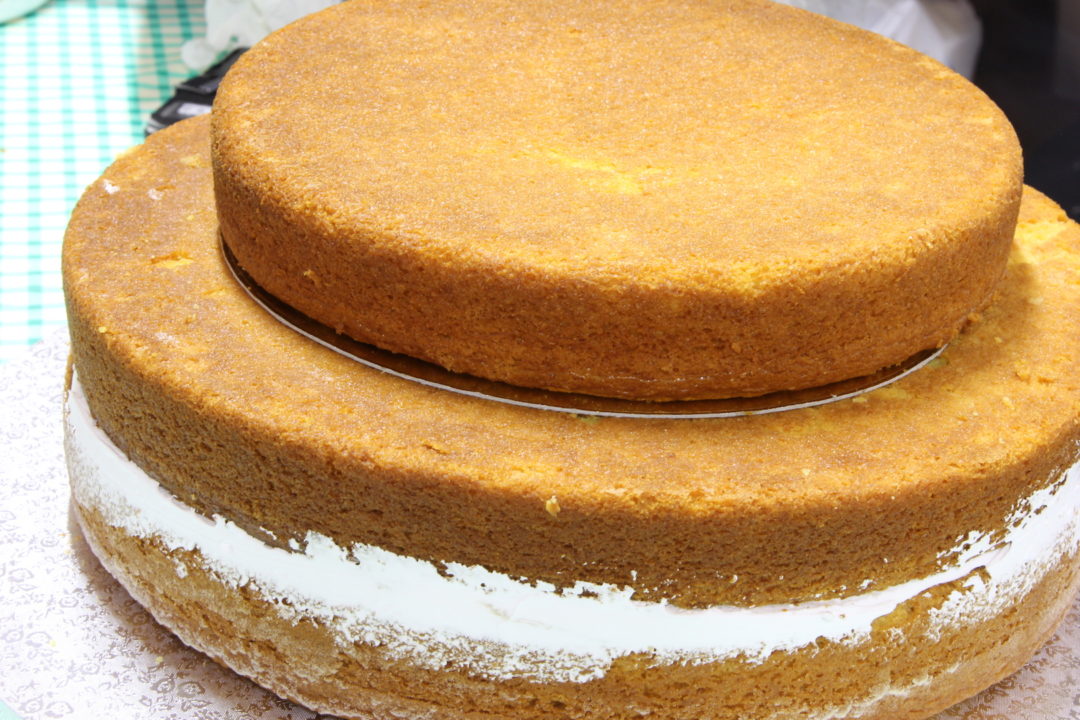
Prepare the Cake Molds:
Grease four molds of varying sizes (largest to smallest).
Line the bottoms with parchment or vegetable paper.
Mix the Ingredients:
In one bowl, combine flour and yeast.
In another, blend the remaining ingredients until smooth.
Gradually incorporate the wet mixture into the flour and yeast, mixing until smooth.
Baking:
Preheat the oven to 180°C (356°F).
Divide the batter evenly between the four molds and bake for 40 minutes.
Check doneness with a skewer; if needed, bake for a few more minutes.
Let the cakes cool in the molds before transferring them to a wire rack to firm up.
Repeat the process for the second batch to complete the remaining layers.
Assembling the Cake
Set Up the Base:
Place a rotating cake table on a sturdy board or trolley for easy transport.
Position a rigid cardboard base on the rotating table and place the largest cake layer on top.
Remove the baking paper.
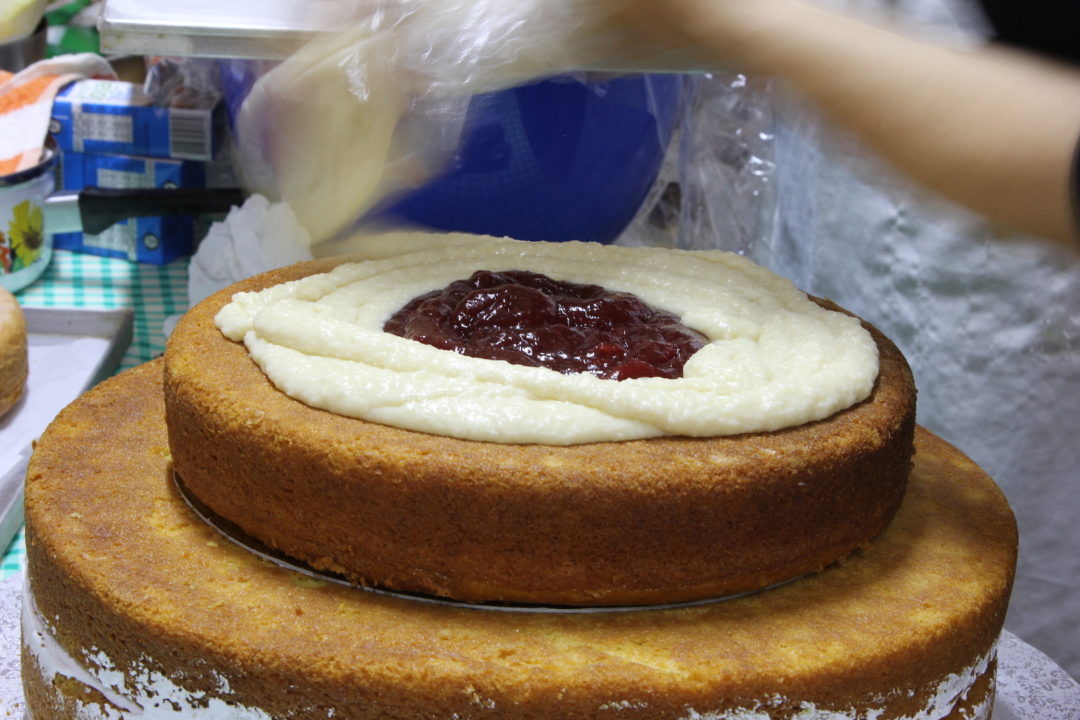
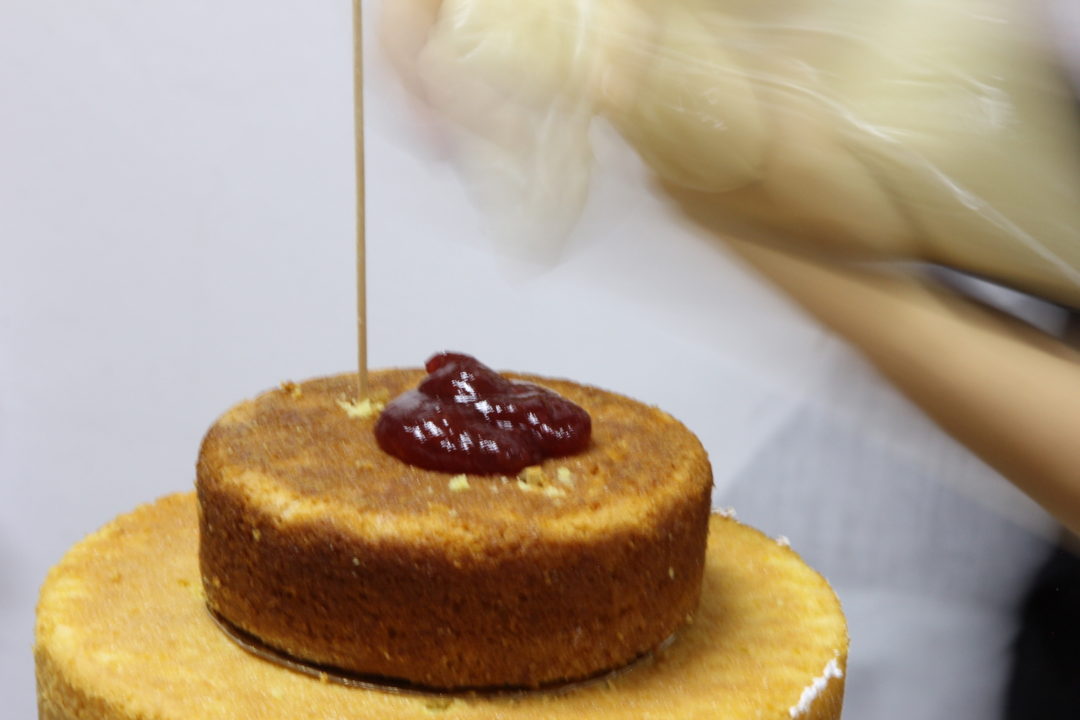
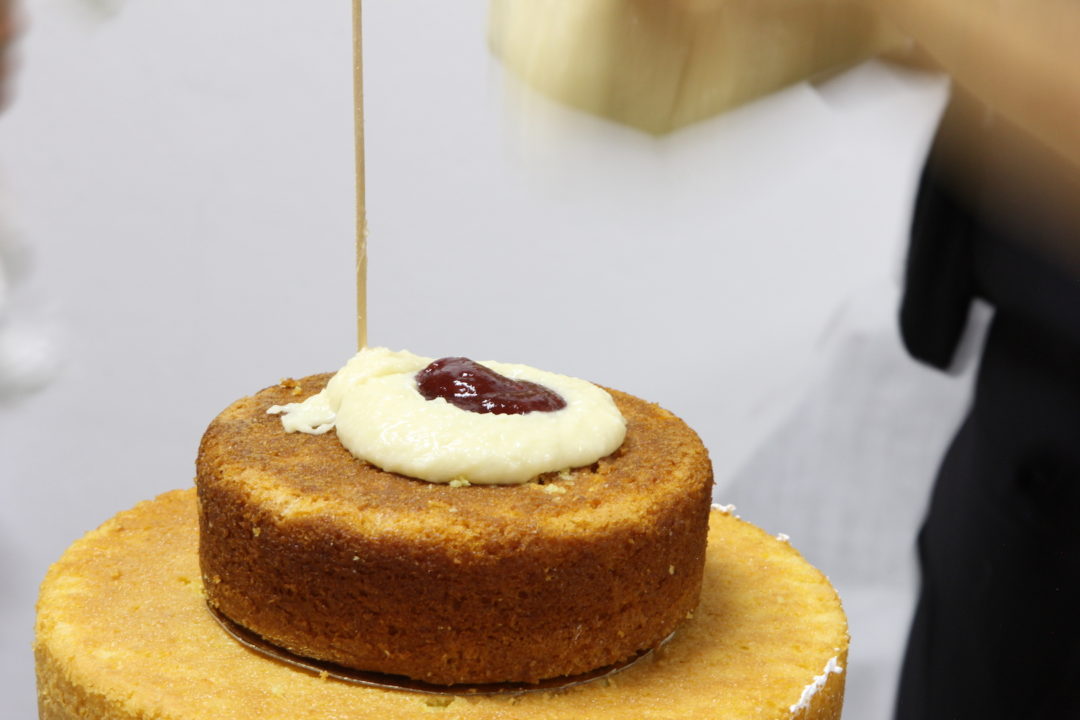
Apply the Filling:
Retrieve the coconut cream and strawberry filling from the refrigerator.
Evenly spread a layer of strawberry and coconut cream over the first cake.
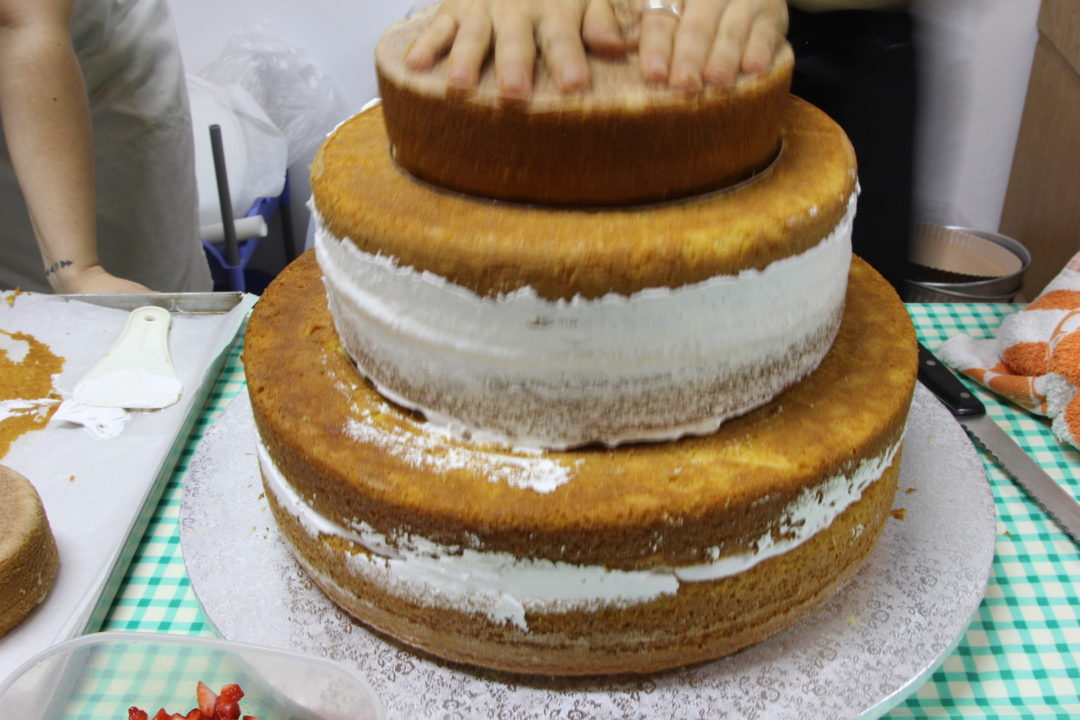
Place the second cake layer on top, pressing down gently to ensure stability and alignment.
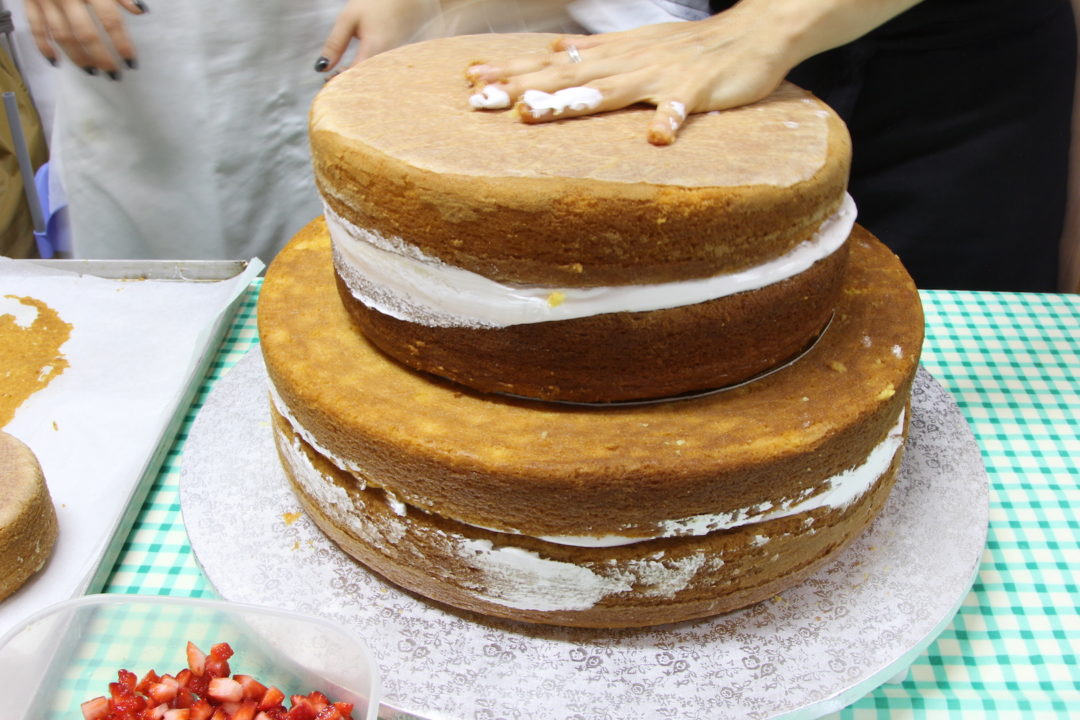
Sealing the Base:
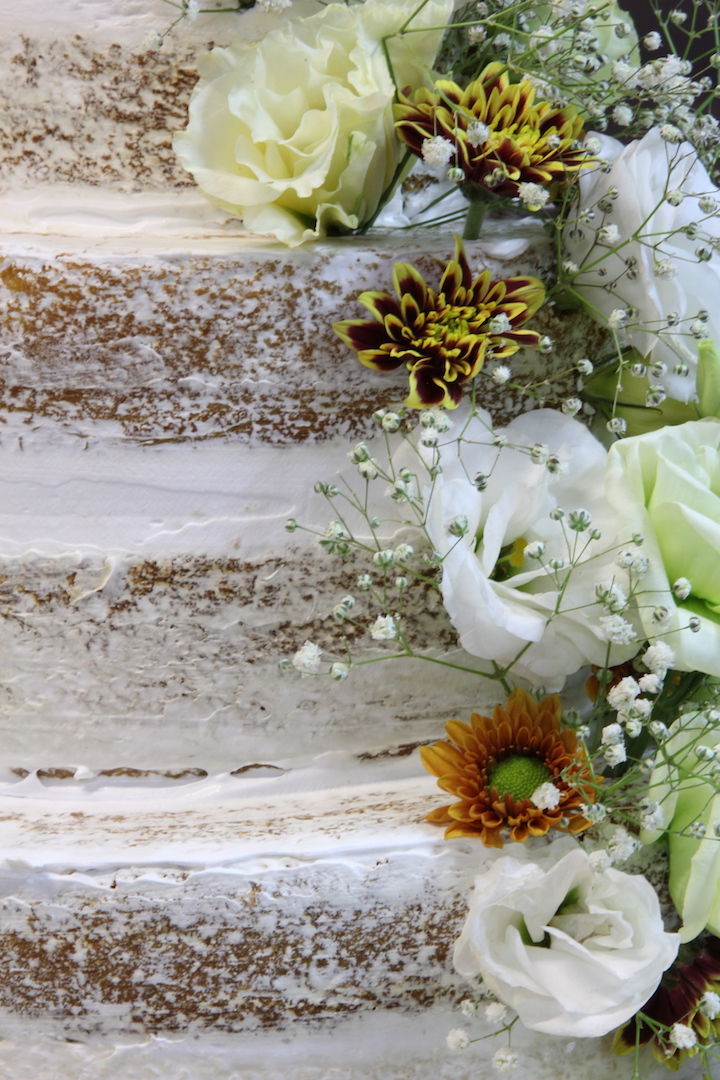
Cover the sides of the assembled base layers with vegan whipping cream.
Using a spatula, remove any excess cream as you rotate the table to create the semi-naked effect—where parts of the cake remain visible beneath a thin layer of cream.
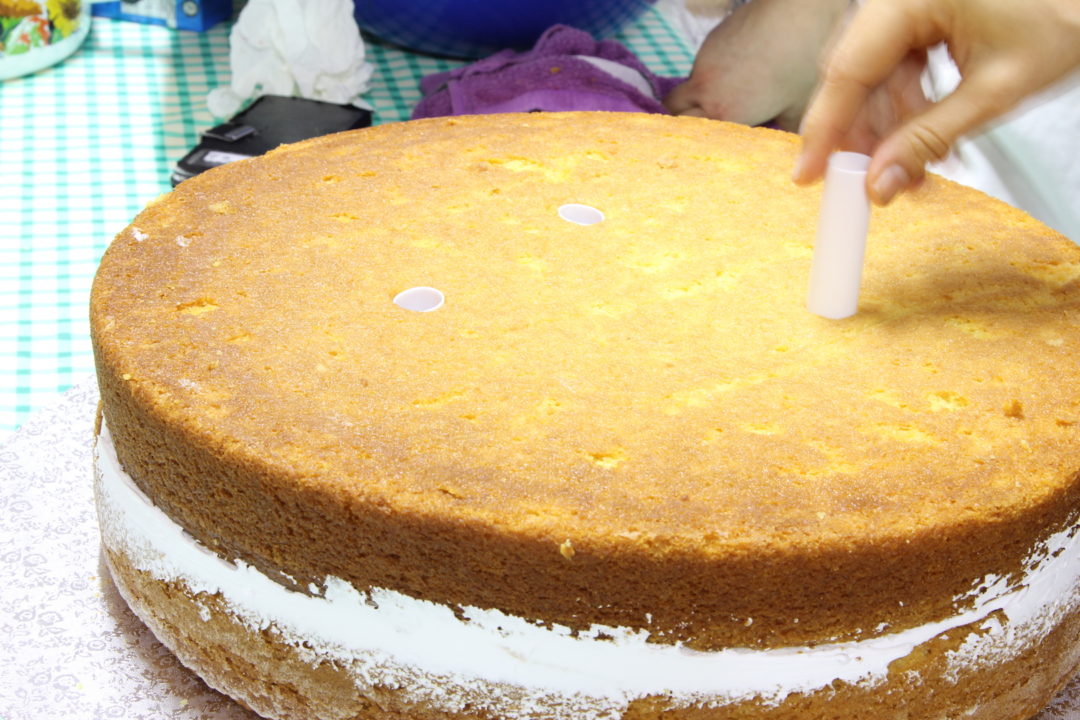
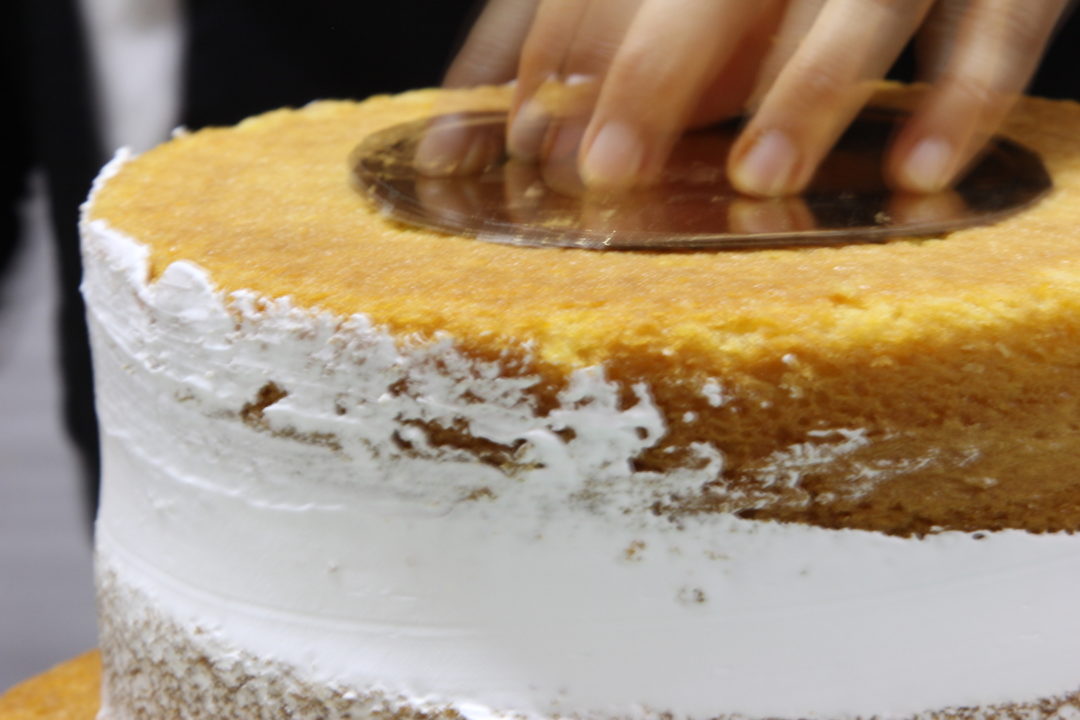
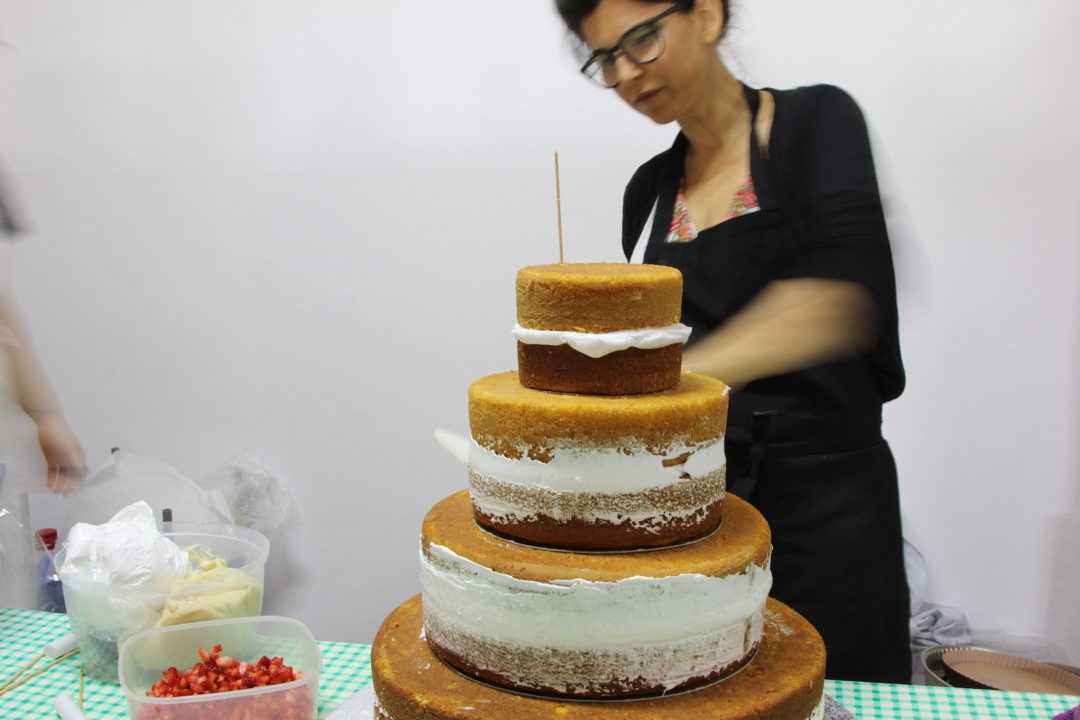
Structural Support:
Cut four plastic tubes to match the height of the base layer.
Insert them evenly into the center to support the second tier.
Continue smoothing the cream while rotating the cake.
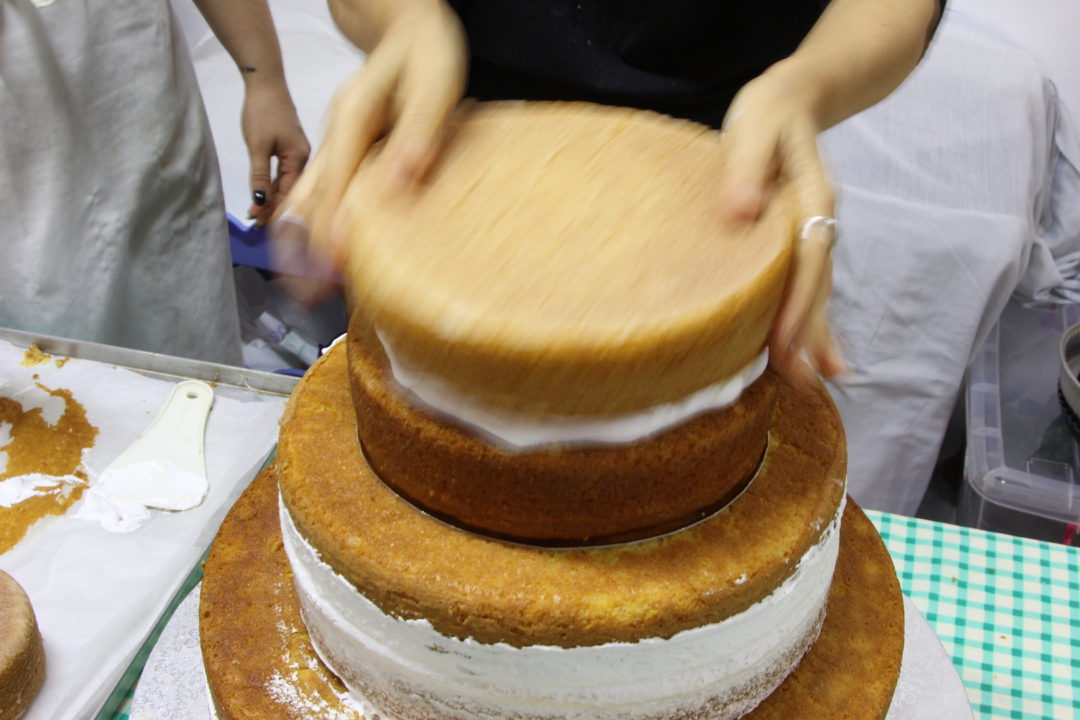
Building the Layers:
Place a paper dish cutout on top of the first tier before adding the second cake layer.
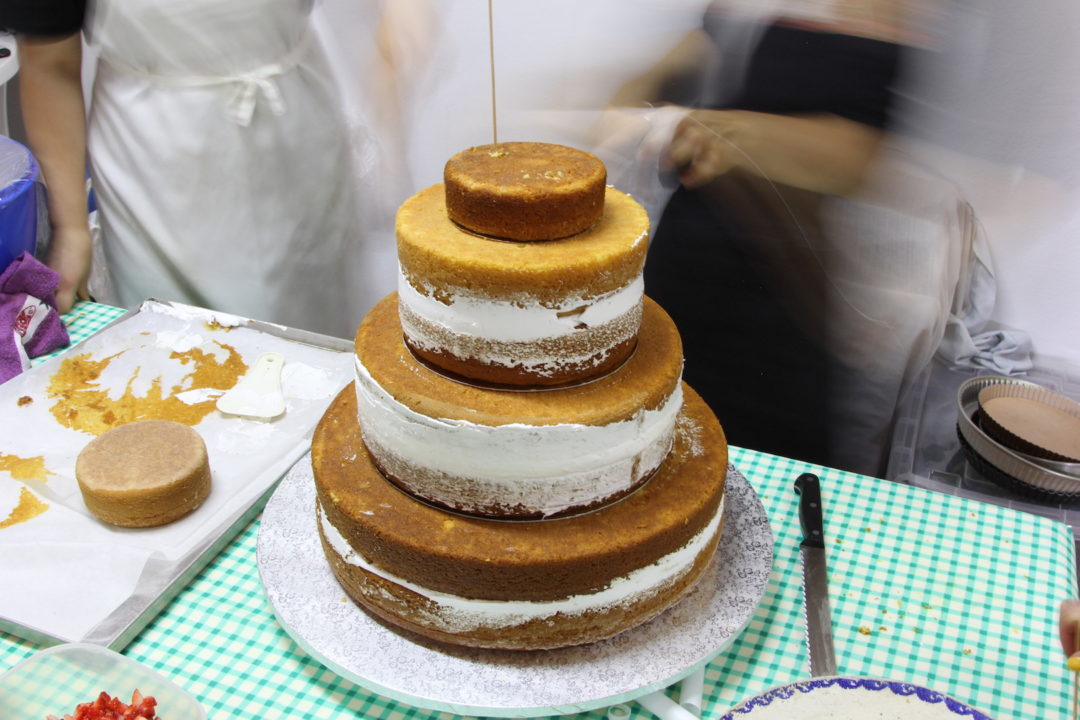
Repeat the filling, sealing, and semi-naked effect for each layer until all four tiers are assembled.
Ensure each layer is level and firmly in place. Secure the top layers with plastic tubes and skewers for stability.
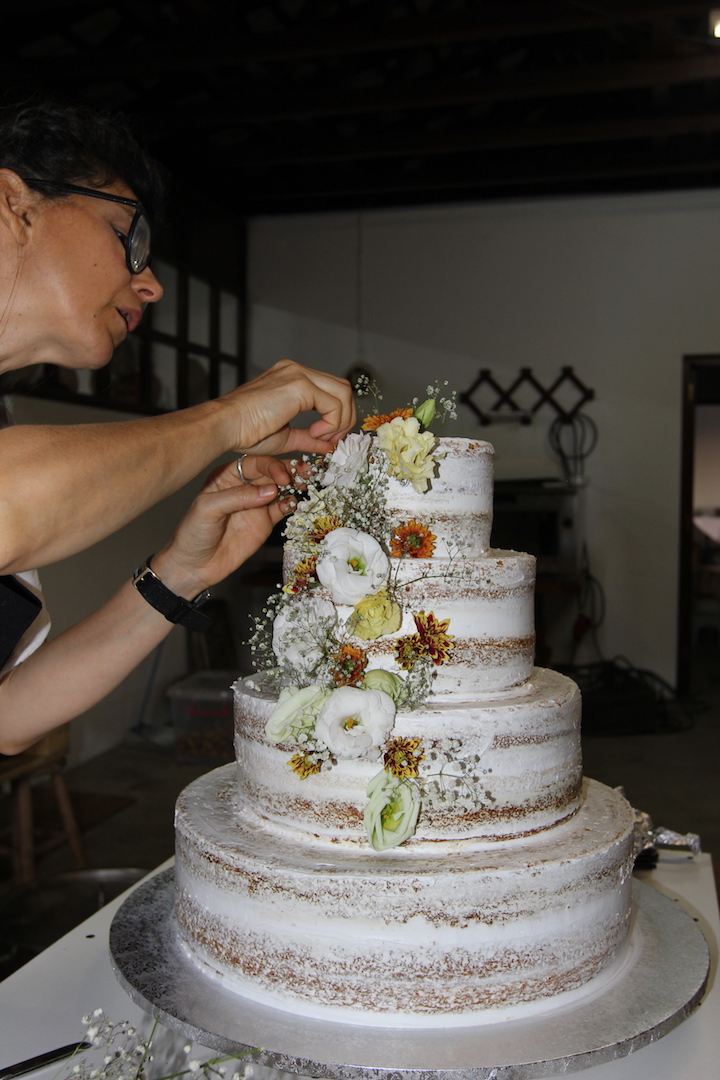
Decoration
Once the cake is assembled, it’s time for decoration. Choose fresh flowers that complement the wedding theme.
Start from the top and arrange them down one side for an elegant, natural look. Less is more—avoid overloading with flowers to maintain simplicity and refinement.
This particular cake was decorated with the bride’s bouquet, a unique and sentimental touch. Instead of letting the bouquet dry or tossing it, incorporating it into the cake turned it into a stunning, meaningful centerpiece, served later in the evening after the ceremony.
Nutrition
-
204.6 Calories
-
31.2g Carbohydrates
-
7.4g Fat
-
0.8g Fiber
-
2.5g Protein
-
15.0mg Sodium
-
0.0g Trans fat
Notes
The four layers must be prepared separately and assembled with precision to avoid a leaning tower effect. Ensure the cake is stable and easy to transport by placing it on a large, square board before moving it to the final cutting area.

No Comments